10 Essential Tips for Working with Metal Studs in Construction
In the world of construction, Metal Studs have become essential for modern building techniques. Expert John Smith, a renowned figure in structural engineering, once stated, "Metal Studs are the backbone of any durable structure." This statement rings true as these materials offer flexibility and strength.
Working with Metal Studs requires a particular skill set. Many professionals overlook the importance of precise measurements. Miscalculations can lead to costly errors. One misplaced stud can undermine the entire framework. It’s crucial to prioritize accuracy and detail.
Safety is also important. Construction sites are places of potential hazards, especially with Metal Studs. Improper handling might lead to injuries. Therefore, understanding the properties of these materials is essential. Engaging in regular training can mitigate risks. Success in construction begins with a solid grasp of Metal Studs' dynamics. Embracing continuous learning can refine one’s expertise in this area.

Understanding Metal Studs: Types and Applications in Construction
Metal studs play a vital role in modern construction. They offer durability and strength, perfect for framing. Available in various sizes and thicknesses, metal studs cater to specific construction needs. Typically made from galvanized steel, they resist rust and corrosion effectively.
When choosing metal studs, consider the project type. Light-gauge studs work well for interior partitions, while heavier gauge options suit load-bearing walls. Additionally, their compatibility with drywall makes installation straightforward. However, improper cutting can lead to sharp edges, which may cause injuries. It's essential to handle and store them correctly to avoid mishaps.
Working with metal studs requires attention and care. One challenge is aligning studs perfectly during installation. Misalignment can lead to issues down the line. Also, some may find the fasteners tricky to work with. Ensuring the right tools are on hand can ease these frustrations. Remember to account for thermal expansion as well; this can affect the overall structure. Such considerations are crucial for a successful build.
Essential Tools for Working with Metal Studs
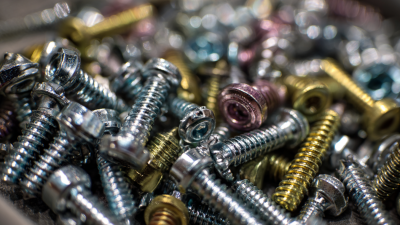
When working with metal studs, having the right tools is crucial for efficiency and precision. Essential tools include metal stud snips, which make cutting easier, and a stud finder to ensure accurate placements. A good level ensures that studs are plumb and straight, while a sledgehammer can help with securing studs quickly.
In a recent industry report, it was noted that improper tool usage significantly increases project duration. For instance, using a dull snip can slow down the process, resulting in a 20% reduction in productivity. Similarly, a poorly calibrated level might lead to uneven walls. This not only affects aesthetics but also increases the likelihood of costly rework. Construction professionals sometimes overlook these tool details, thinking they can save time. This often leads to more significant issues down the line.
Safety gear, like gloves and goggles, is also essential. Injuries from mishandling tools are common. Reports show that improper use of tools resulted in 30% of accidents on job sites. It's a reminder that rushing can lead to mistakes. Choosing the right tool is just as important as knowing how to use it effectively. Investing in quality tools saves time and enhances safety.
10 Essential Tips for Working with Metal Studs in Construction - Essential Tools for Working with Metal Studs
| Tool Name |
Purpose |
Recommended Size |
Material Compatibility |
| Drywall Screw Gun |
Driving screws into metal studs |
Variable Speed |
Steel, Aluminum |
| Metal Shears |
Cutting metal studs |
10-14 Gauge |
Steel |
| Framing Square |
Ensuring right angles |
24 inch |
Universal |
| Level |
Check for level and plumb |
48 inch |
Universal |
| Cordless Drill |
Drilling holes and fastening |
1/2 inch Chuck |
Steel, Aluminum |
| Tinsnips |
Cutting sheet metal |
Standard Size |
Steel, Aluminum, Tin |
| Laser Level |
Aligning studs |
Adjustable Range |
Universal |
| Caulk Gun |
Sealing joints |
Standard Size |
Universal |
| Safety Glasses |
Eye protection |
Universal Fit |
Universal |
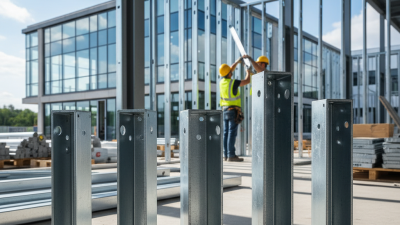
Preparation Steps for Installing Metal Studs Safely
When preparing for metal stud installation, safety should be your first consideration. Begin by gathering the necessary tools. This includes a measuring tape, level, and appropriate fasteners. Ensure that the workspace is clean and free from debris. A tidy area helps reduce hazards and allows better visibility.
Wearing safety gear like goggles and gloves is crucial. These protect you from potential injuries while handling sharp metal edges.
Next, take precise measurements. Accurate measurements are vital for a successful installation. Double-check wall heights and spacing before cutting studs. Even a slight mistake can lead to frustration later. If mistakes happen, reflect on what went wrong rather than rushing to fix it. Cutting metal studs can be tricky. Use a proper cutting tool, and follow safety guidelines. Ensure you have a stable surface to work on. Painting the studs before installation can save time later.
As you start assembling, remember to secure each stud properly. Check for alignment frequently. Misalignment can compromise the entire structure. If you notice any deviations, take the time to adjust. Rushing through assembly can lead to significant issues. It's crucial to review your work regularly. Take a step back and look at the structure as a whole. This perspective allows for a clearer evaluation of what needs fixing. Progress might be slow, but ensuring safety and accuracy will pay off in the long run.
Techniques for Fastening and Aligning Metal Studs
When working with metal studs, proper techniques for fastening and aligning them are crucial. According to a report by the Steel Framing Alliance, nearly 70% of construction professionals prefer metal studs due to their durability and precision. Ensuring that studs are aligned correctly can prevent costly adjustments later on. Begin by using a laser level to ensure accuracy in your layout. This can dramatically improve the outcome of your project, minimizing the risk of misalignment.
Fastening metal studs requires attention to detail. Utilize self-tapping screws designed for metal. These screws are essential for achieving a strong hold. The typical fastening distance should be no more than 24 inches to ensure stability. However, many practitioners neglect this detail, leading to insufficient support. It might be tempting to overlook small gaps. These gaps can manifest into bigger issues, impacting the overall structure.
Properly anchoring metal studs also involves using the correct tools. A high-torque drill is recommended. However, some workers fail to adjust torque settings. Over-tightening screws can lead to material fatigue. Yet, under-tightening can cause structural weaknesses. Reflecting on these common mistakes can lead to improved practices and outcomes in future projects.